






Most DTF transfer problems come down to one of three variables: heat, pressure, or the condition of the garment going into the press. Once you understand what causes each failure mode, fixing it — and preventing it from happening again — is straightforward. This guide covers the most common DTF transfer mistakes decorators run into, what causes each one, and the specific correction to apply.
Whether you are just starting out with DTF or have been pressing for a while and are seeing recurring issues, working through this list systematically will solve most application problems without guesswork. For general heat press settings by fabric type, see our DTF heat press settings guide.
Mistake 1: Transfer Not Bonding or Lifting Right After Peeling
The transfer seems to apply normally but peels away easily — either the entire design lifts with the film when you peel, or sections of the design lift off the fabric immediately after peeling.
Causes
● Temperature too low — the adhesive did not reach full activation temperature
● Press time too short — not enough dwell time for the adhesive to bond to the fibers
● Pressure too light — the transfer did not make full contact with the fabric surface
● Moisture in the fabric — steam from a damp garment prevented proper bonding
Fix
First, pre-press the garment for 3 to 5 seconds before applying the transfer. This removes moisture from the fabric — the most overlooked step in DTF application. Fabric absorbs ambient humidity, and steam generated during the main press prevents the adhesive from bonding properly.
If pre-pressing does not solve it, increase temperature by 5°F increments and test on a scrap piece. Standard cotton presses at 300 to 315°F for 10 to 15 seconds. If you have been pressing below 300°F, this is likely the issue. Confirm your heat press temperature with an infrared thermometer — many consumer heat presses run 10 to 20°F below their displayed setting.
Also check pressure: close the press on a piece of paper placed under the platen. You should feel slight resistance pulling the paper out. If the paper pulls out easily with no resistance, pressure is too light.
Mistake 2: Edges of the Transfer Lifting or Peeling After Washing
The transfer looks good right after pressing, but after the first or second wash the edges begin to lift or curl away from the fabric.
Causes
● Incomplete adhesive bond at the edges — edges are the last to bond and first to fail if pressure or temperature is slightly low
● No finishing press after peeling — skipping the second press leaves the adhesive partially set
● Washing in hot water — heat reactivates the adhesive slightly and repeated thermal cycling breaks the edge bond
● High dryer heat — same mechanism as hot water, accelerated by the dryer tumbling that flexes the garment repeatedly
Fix
Add a finishing press after peeling: place a Teflon sheet or parchment paper over the design and press for 3 to 5 seconds at the same temperature. This second press sets the adhesive at the edges and eliminates the most common source of edge lift.
Also verify that the transfer is not being cut right to the edge of the design. If your transfer supplier cuts very close to the ink edge, leaving a very narrow adhesive margin, edge adhesion is naturally weaker. A small amount of clear adhesive border around the design helps the edges bond more securely.
Include wash care instructions with every garment you sell: cold water, inside out, low-heat or air dry. Hot water and high dryer heat are the primary causes of post-wash edge lifting. See our DTF wash and care guide for the complete care protocol.
Mistake 3: Print Cracking After Washing
The design looks clean right after pressing but develops fine cracks or a cracked-paint texture across the surface after several washes.
Causes
● Temperature too high during pressing — overheating can partially cure the adhesive before it penetrates the fibers, leaving a brittle bond
● Pressing a transfer that was stored incorrectly — transfers damaged by humidity or heat during storage may have compromised adhesive that appears fine when pressed but fails under washing
● High dryer temperature — repeated high heat drying is the most common cause of post-wash cracking
● Design printed on too-thick an adhesive layer — a manufacturing issue rather than an application issue
Fix
If cracking appears immediately after the first wash, check your dryer temperature. High heat drying is the single most common cause of premature cracking on otherwise well-applied DTF transfers. Switch to low heat or air dry and the problem typically stops.
If cracking appears on the press output itself or within the first press-and-peel, temperature is likely too high. Reduce by 5 to 10°F and test again. Transfers pressed at excessive temperatures bond the adhesive to itself rather than to the fabric fibers — the adhesive cures before it fully penetrates, creating a surface bond that cracks with fabric flex.
If the problem appears consistently across transfers from a specific batch and not in others, the stored transfers may have been damaged. Check your storage conditions — transfers should be stored flat in a cool, dry environment away from humidity. See our DTF storage guide for proper storage protocol.
Mistake 4: Blurry or Soft Print Detail
Fine lines, small text, or detailed artwork looks blurry, soft, or pixelated on the finished shirt — not sharp and clean the way the digital file looked.
Causes
● Low-resolution artwork submitted for the transfer — the most common cause by far
● Design file sized too small and scaled up during production — scaling up a low-DPI file creates soft edges
● Rasterized file with anti-aliasing on a transparent background — the semi-transparent pixels around design edges become visible as a soft halo
Fix
This is almost always an artwork issue rather than a press or adhesive issue. DTF transfers reproduce artwork exactly as submitted — if the source file is low resolution, the transfer will be low resolution.
Submit artwork as a PNG file with a transparent background at 300 DPI minimum, measured at the actual intended print size. A file that is 300 DPI at 5 inches wide and then scaled to 12 inches wide during production drops to approximately 125 DPI — soft and visibly pixelated. Create or request artwork at the exact print size and resolution.
For vector-based logos (EPS or AI files), export to PNG at 300 DPI at the intended print size rather than submitting at a small default size. Our DTF artwork preparation guide covers all file specifications in detail, including how to handle semi-transparent pixels and soft edges that cause halo artifacts around designs.
Mistake 5: Shiny Platen Marks or Scorch Spots on the Fabric
After pressing, the garment shows a visible rectangular imprint of the platen — a shiny, flattened area on the fabric surface — or dark scorch spots on light-colored fabrics.
Causes
● Temperature too high for the fabric type — synthetic fabrics and lightweight cotton are most susceptible
● Press time too long — extended dwell at high temperature scorches the fabric
● Pressing directly on the fabric surface without a Teflon sheet or parchment paper over the garment
● Damp fabric touching a hot platen — creates steam scorch marks on light fabrics
Fix
Always press with a Teflon sheet or parchment paper between the top platen and the garment, especially on light-colored fabrics. This distributes heat more evenly and prevents direct platen contact that leaves shiny impressions on the fabric surface.
Pre-press the garment first to remove moisture before the main press cycle. A damp garment under a hot platen creates steam that marks the fabric surface.
If scorch marks are appearing at your current settings, reduce temperature and test. For lightweight cotton and poly-blend fabrics, 295 to 305°F is usually sufficient. For synthetic fabrics, drop to 270 to 290°F. Verify your heat press is not running hot — calibrate with an infrared thermometer.
Mistake 6: Transfer Applied in the Wrong Position
The design is too high, too low, crooked, or off-center on the finished garment.
Causes
● No placement guide or ruler used during positioning
● Garment shifted during placement after the transfer was set down
● Rushing the positioning step under production pressure
Fix
Use a laser alignment tool or a T-square ruler to position each garment consistently. For left chest designs, the standard placement is 3 to 4 inches down from the shoulder seam and 4 inches from the center front — mark this on a card template and use it as a guide for every shirt.
Once a DTF transfer is placed on a garment, repositioning it is possible only if you have not breathed on it or introduced any moisture — some decorators lightly tack the transfer to the garment with a brief one-second press to lock position before full pressing. For high-accuracy work, use a heat press with a laser placement grid or invest in a placement tool.
If a transfer is pressed in the wrong position, it cannot be cleanly removed from most fabrics. The adhesive bond is permanent. Prevention through consistent placement technique is the only reliable solution.
Mistake 7: White Underbase Showing Around Design Edges
The finished transfer has a faint white border or halo visible around the design edges — more noticeable on dark-colored fabrics.
Causes
● The white underbase layer in the DTF file extends slightly beyond the color artwork — a production issue on the transfer itself
● The film was cut slightly outside the design edge, leaving a narrow strip of adhesive-coated clear film visible
● The design file had a slight transparent or white-filled area outside the intended design boundary
Fix
A small amount of white border on a DTF transfer is normal and expected — the white underbase needs to cover the full design area plus a slight overlap to ensure color ink does not fall outside the opaque white base. A border of 1 to 2mm is standard and usually invisible at normal viewing distance.
If the border is larger than 2 to 3mm and clearly visible, the issue is likely in the artwork file — a white-filled background rather than a transparent background, or soft anti-aliased edges that create a visible transition zone. Resubmit the artwork with a true transparent background and hard-edged design boundaries. Our artwork preparation guide explains how to set up files correctly to minimize underbase halo.
Mistake 8: Color Looks Different on the Shirt Than in the Design File
The pressed transfer has colors that look noticeably different from the digital design — often appearing darker, more saturated, or shifted in hue compared to the screen version of the file.
Causes
● Screen color profiles (RGB) versus print color profiles (CMYK) — screens display colors in RGB which has a wider color gamut than CMYK printing
● Fabric color affecting perceived color — a white shirt versus a cream or light grey shirt changes how the same ink color reads
● Garment color bleeding through thin areas of the design — light-colored fabric shows through insufficiently dense ink coverage
Fix
Design artwork in CMYK color mode rather than RGB when possible, or convert to CMYK before submitting. Colors that appear vivid in RGB — electric blue, neon green, bright orange — will print somewhat muted in CMYK because those specific colors are outside the CMYK printable gamut. Adjusting the design file to CMYK before submission sets accurate expectations for the final print color.
If the garment base color is affecting the appearance of the transfer, the white underbase ink should handle this — a properly printed DTF transfer with a full white underbase reproduces color consistently on any background. If underbase coverage appears thin or the garment color bleeds through, this is a production quality issue to raise with your transfer supplier.
A Quick Pre-Press Checklist
Running through this list before every press session prevents the majority of DTF application errors:
● Heat press calibrated and at correct temperature — verified with infrared thermometer if possible
● Garment pre-pressed for 3 to 5 seconds to remove moisture
● Transfer positioned correctly using a placement guide or ruler
● Teflon sheet or parchment paper on hand for the finishing press
● Correct press time set on the timer before closing
● Garment lying flat on the platen with no bunching or folding under the press area
Five minutes of setup prevents the mistakes that cost you garments and transfers. If you are still running into recurring issues after working through this checklist, reach out through our contact page with specifics about your press settings, fabric type, and the failure mode — we can help diagnose the issue before it affects more of your production.
Frequently Asked Questions
Why is my DTF transfer not sticking to the shirt?
The most common causes are insufficient temperature, insufficient press time, moisture in the fabric, or too-light pressure. Pre-press the garment first (3 to 5 seconds) to remove moisture. Then confirm your heat press is reaching the correct temperature — 300 to 315°F for standard cotton — with an infrared thermometer. Press at medium-firm pressure for 12 to 15 seconds. If adhesion is still incomplete, increase temperature by 5°F and test again.
Why is my DTF transfer cracking after washing?
High dryer temperature is the most common cause. Switch to low heat or air dry and the cracking typically stops. If cracking appears after just one wash on air-dried garments, the issue is likely pressing temperature that was too high — overheating cures the adhesive on the surface rather than driving it into the fabric fibers, creating a brittle bond. Reduce temperature by 5 to 10°F and test.
Can I fix a DTF transfer that was applied in the wrong spot?
Unfortunately, no — not reliably. Once a DTF transfer is fully pressed and bonded, the adhesive is permanent and removing it typically damages the fabric. Prevention through consistent use of placement guides and rulers is the only reliable solution. For transfers that did not bond correctly and can be peeled off, reapplication to the same garment is sometimes possible if the garment surface is undamaged — test the rebonded transfer before delivering it.
Why does my DTF design look blurry?
This is almost always a low-resolution artwork issue. Submit design files as PNG with a transparent background at 300 DPI at the exact intended print size. Scaling a small, low-DPI file up to print size produces a visibly soft or pixelated result. See our artwork prep guide for full file specifications.
Most DTF Mistakes Are Preventable
The good news about DTF transfer application errors is that the same issues recur predictably — and once you have identified and fixed each one, they rarely come back. Temperature, pressure, moisture, and artwork quality account for the vast majority of problems decorators encounter. Build a consistent pre-press routine, calibrate your heat press, and submit print-ready artwork, and your production runs will be clean.
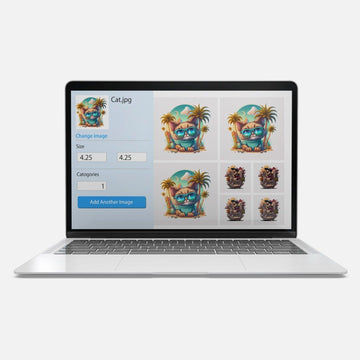
If you are sourcing transfers and want to make sure quality is consistent on the supplier side, our DTF transfer sample pack is the easiest way to test transfer quality before placing a larger order. And if you are building your transfer inventory, the gang sheet builder gives you full control over layout and cost per design.


