






Custom denim is one of the most popular substrates in the decorated apparel market — denim jackets with back graphics, custom jeans with thigh patches, denim shorts with pocket designs. DTF transfers bond well to denim fabric, but denim's thickness, texture, and stiff construction require a few specific adjustments compared to pressing a standard cotton t-shirt.
This guide covers exactly how to apply DTF transfers to denim jackets, jeans, and shorts — the right heat press settings, how to handle thick seams and uneven surfaces, what areas of denim items press cleanly versus which require extra care, and how to get a durable bond that holds up through the washing denim normally gets. If you are looking to expand your DTF decoration work beyond apparel into denim accessories and outerwear, this is the practical starting point.
Why DTF Works on Denim
Denim is a cotton twill weave — typically 100% cotton or a cotton-elastane blend for stretch denim. The cotton fiber content means the DTF hot-melt adhesive bonds to denim through the same mechanism as standard cotton t-shirts: heat activates the adhesive, it penetrates the cotton fibers, and the bond cures as it cools. The fundamental chemistry is the same.
What makes denim different is the physical structure. Denim is heavier and denser than jersey-knit t-shirt fabric, which means it takes longer to transmit heat through to the transfer interface. The twill weave creates a slight diagonal texture at the fabric surface, which the adhesive has to bridge across rather than bonding into a smooth, open-weave surface. And denim items — especially jackets and jeans — have seams, rivets, pockets, and structural panels that create uneven pressing surfaces in areas where you might want to place a design.
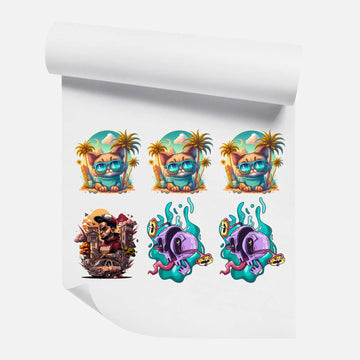
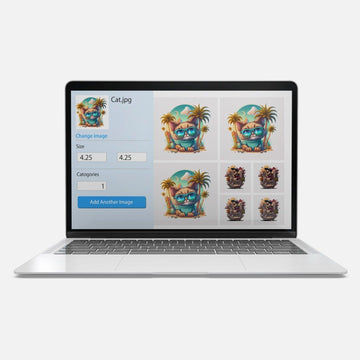
None of these factors prevent DTF on denim. They just require adjusted technique. The gang sheet builder is the most efficient way to order denim-specific transfer sizes — back panel designs, thigh patch designs, and pocket-area transfers can all be arranged on one sheet to minimize cost.
Heat Press Settings for Denim
Denim requires higher temperature and longer press time than standard cotton t-shirt fabric because of its density. The heat needs to penetrate through the heavier fabric to fully activate the adhesive at the transfer interface.
● Temperature: 310 to 325°F (154 to 163°C)
● Time: 15 to 18 seconds — longer than standard cotton to allow full heat penetration through the dense twill
● Pressure: Medium-firm — sufficient to seat the transfer across the textured denim surface without crushing the twill weave flat
Always pre-press denim for 5 seconds before applying the transfer. Denim holds significantly more ambient moisture than lighter fabrics, and this moisture creates steam during the main press that prevents clean adhesive bonding. Pre-pressing drives the moisture out before the transfer goes down.
After peeling, cover the design with a Teflon sheet and press again for 4 to 5 seconds at the same settings. This finishing press is especially important on denim because the textured surface can leave small air pockets between the transfer and the fabric. The second press closes these pockets and ensures full surface contact across the adhesive layer. For broader heat press setting reference, see our DTF heat press settings guide.
Denim Jacket: Back Panel Design
The back panel of a denim jacket is the most common and most straightforward DTF denim application. The back panel is a large, relatively flat section of fabric that can accommodate full back designs up to 12 to 14 inches wide. It lies flat on the platen with minimal interference from seams when the jacket is positioned correctly.
Positioning the Jacket on the Platen
Lay the denim jacket face-down on the heat press platen so the back panel is centered under the top platen. The side seams of the jacket fall at the edges of the platen or slightly beyond — this is fine. The collar seam at the top of the back panel and the waist seam at the bottom create slight ridges, but if your design stays within the middle section of the back panel — roughly 2 inches below the collar seam and 2 inches above the waist seam — neither seam interferes with pressing.
Stuff the jacket sleeves and body interior with heat-resistant foam or a pressing pillow to create a firm, even backing for the press. Without internal support, the back panel can compress unevenly under platen pressure and produce inconsistent adhesion across the transfer.
Design Sizing for Denim Jacket Back Panels
A standard denim jacket back panel accommodates designs from 10 to 14 inches wide and 10 to 12 inches tall for a full back graphic. For a medium-sized logo or graphic positioned on the upper back (yoke area), 6 to 8 inches wide is a natural fit. For a name or text strip across the upper back, full width up to 14 inches is achievable on most adult jacket sizes.
Denim Jacket: Chest and Sleeve Designs
Smaller designs on denim jacket front panels and sleeves are popular — a left chest logo, a right chest badge graphic, or a sleeve stripe design. These smaller applications require more precise platen positioning because the jacket construction creates more interference around smaller design areas.
Left Chest Placement
For a left chest design on a denim jacket, open the jacket flat and slide the front left panel over a smaller platen or a sleeve board attachment. The button placket on the right side of the opening should not be under the platen. A standard left chest design of 3.5 to 4.5 inches wide fits cleanly above the breast pocket on most adult denim jackets.
If the jacket has a breast pocket in the placement area, you have two options: place the design above the pocket with 1 inch clearance from the pocket seam, or remove the pocket entirely (on custom work where that is appropriate) and place the design centered where the pocket was. Pressing directly over a pocket seam creates an uneven pressing surface that results in poor adhesion along the seam line.
Denim Jeans: Thigh and Leg Designs
Custom denim jeans with transfer designs on the thigh, outer leg, or back pocket area are a growing custom apparel category. DTF transfers on jeans work well in flat areas away from seams — specifically the outer thigh panel, the mid-shin panel, and the seat area on straight-leg or wide-leg styles.
Thigh Panel Placement
The outer thigh is the most practical spot for a denim jean transfer — it is the largest flat panel on the front leg and has minimal seam interference. Slide a leg board or sleeve platen inside the jean leg so the thigh panel lies flat over the platen. Position the design centered on the outer thigh, approximately 3 to 5 inches below the hip seam.
A thigh design on adult jeans typically works at 5 to 8 inches wide — larger designs risk overlapping the inseam or outseam on the sides. Test the transfer placement with a paper mock-up before pressing to confirm the design fits cleanly within the flat panel area.
Pocket Area Placement
Back pocket transfers on denim jeans are popular for brand logos, monograms, and small graphic marks. The back pocket panel is small — typically 5 to 6 inches wide and 5 to 6 inches tall — so designs need to be sized appropriately (3 to 4 inches wide for most pocket placement work). Pressing over the pocket seam edge creates an uneven surface; position the design to sit fully within the pocket panel, not crossing the stitched seam.
Denim Shorts: Panel and Cuff Designs
Denim shorts follow the same pressing logic as jeans — flat panel areas away from seams work cleanly. The outer thigh panel of denim shorts is typically 6 to 8 inches tall (from hip seam to raw hem), which accommodates compact designs of 4 to 6 inches wide. Cuff or hem designs on folded denim shorts require unfolding the cuff and pressing the flat hem area separately, then re-cuffing after the transfer cools.
Handling Thick Denim Seams
The biggest challenge with any denim item is the seams. Denim construction uses heavy-duty stitched seams — often double or triple stitched with reinforced thread — that create raised ridges 2 to 4mm higher than the surrounding fabric surface. When the heat press platen closes over a seam area, the platen bridges the seam gap rather than applying even pressure across the transfer, leaving sections of the design adjacent to the seam unbonded.
The practical rule: keep transfer designs at least 1 inch away from any stitched denim seam. Design placement that crosses or sits directly over a seam will have adhesion problems at the seam line regardless of settings. If your design concept requires crossing a seam, use a seam roller to flatten the seam as much as possible before pressing, and plan for slightly weaker adhesion in the seam-crossing area.
For jeans and jackets where the pressing area has multiple seams (like the waistband area or the crotch panel), avoid pressing near these areas entirely and work only in the open flat panels.
DTF on Stretch Denim
Stretch denim — typically a cotton-elastane blend with 1% to 4% spandex — is used for skinny jeans, fitted denim jackets, and jeggings. The spandex content makes the fabric more flexible and form-fitting, which affects DTF application the same way it does on other stretch blends: the transfer itself does not stretch, so areas of the design under frequent flex stress (like behind the knee on jeans) may show edge lifting over time.
For stretch denim, place designs in areas that experience less stretch during wear — the outer thigh, the calf, the back panel of a jacket. Avoid placing designs directly over articulation points like knees and elbows on fitted stretch items. Also reduce pressure slightly when pressing stretch denim — high platen pressure can distort the stretched fabric, and when it returns to its natural shape after cooling, the transfer surface may develop micro-wrinkles.
Wash Care for DTF-Printed Denim
Denim is typically washed inside out to preserve color — a practice that also benefits DTF transfers on denim. Always wash DTF-printed denim inside out in cold water. Denim benefits from air drying rather than machine drying for both the fabric and the DTF transfer bond. If machine drying is necessary, low heat only.
One denim-specific consideration: raw or unwashed denim can bleed indigo dye into surrounding fabrics and onto the press platen during pressing. Pre-wash raw denim items before pressing DTF transfers to remove loose surface dye. Full DTF wash care instructions are in our DTF wash and care guide.
Popular DTF Denim Applications
Custom Denim Jacket Back Patches
Band-style back patch graphics on denim jackets — oversized artwork filling the full back panel — are one of the most in-demand custom denim applications. Vintage band tees, graphic prints, and branded artwork all translate cleanly from digital files to DTF transfers and from transfers to denim jacket backs. For large back panel designs, use the gang sheet builder to order a full-back transfer at the right dimensions without excess waste.
Embroidered Patch-Style Designs
DTF transfers that mimic the look of embroidered patches — a classic patch shape with a solid border, a text arc, a mascot centered in a badge format — are popular on denim because they look intentional and tailored against the denim background. Unlike actual embroidery, DTF transfers reproduce fine detail and color gradients that embroidery cannot, at a fraction of the cost. See our DTF vs embroidery comparison for a full breakdown of when each method makes more sense.
Denim Tote Bags and Accessories
Denim tote bags, coin purses, and denim fabric accessories follow the same pressing logic as denim apparel — flat panels, away from seams, pre-pressed to remove moisture, medium-firm pressure with extended time. For denim tote bags specifically, insert a pressing pillow inside the bag body before pressing to create a firm, even backing surface. Our DTF tote bag guide covers canvas and fabric accessory pressing in more detail.
Frequently Asked Questions
Can you put DTF transfers on denim jackets?
Yes. DTF transfers bond well to denim jacket fabric — both the back panel and front chest areas — using adjusted settings: 310 to 325°F, 15 to 18 seconds, medium-firm pressure. Pre-press the jacket to remove moisture and do a finishing press after peeling. Keep designs at least 1 inch from stitched seams for clean adhesion.
What temperature should I use for DTF on denim?
310 to 325°F (154 to 163°C) with a press time of 15 to 18 seconds. Denim is denser than standard t-shirt fabric and requires more heat and time for the adhesive to fully activate and bond to the cotton twill fibers. Always pre-press denim for 5 seconds before applying the transfer.
Will DTF transfers crack on denim after washing?
A properly pressed DTF transfer on denim holds up well through regular washing when cared for correctly: cold water, inside out, low heat or air dry. Washing denim in hot water or drying on high heat breaks down the adhesive bond over time. Denim is typically air-dried or low-heat dried anyway to preserve the fabric, which is the ideal wash care for DTF transfers as well.
Can DTF transfers go on stretch denim or jeans with elastane?
Yes, with some placement considerations. Stretch denim (1 to 4% spandex) presses well at standard denim settings with slightly lighter pressure. Place designs in lower-stretch areas like the outer thigh or calf rather than over high-flex articulation points like the knee, where differential stretch can cause edge lifting over time with frequent wear.
Denim Is Worth Adding to Your DTF Product Line
Custom denim commands a higher price point than standard apparel — buyers expect to pay more for a custom denim jacket or personalized jeans than for a printed t-shirt. The DTF application technique on denim is more involved than pressing a flat jersey tee, but the results and the price premium both justify the extra steps.
If you are ready to test DTF on denim, start with a single denim jacket back panel design. Order the transfer through the gang sheet builder and use a sample pack to practice the press technique on an inexpensive test jacket before committing to custom pieces.


