








One of the most common questions after a DTF transfer is pressed in the wrong spot — or a customer returns a shirt with a design they no longer want — is whether the transfer can be removed. The honest answer: DTF transfers can be partially or fully removed in some situations, but the process is not as clean or simple as applying them. The adhesive that makes DTF transfers durable through 50-plus washes is the same adhesive that makes removal difficult.
This guide covers the realistic options for removing a DTF transfer from a shirt — the heat method, solvent-assisted removal, what success actually looks like on different fabric types, and how to protect the garment during the process. It also covers when removal is not worth attempting and what your alternatives are.
Why DTF Transfers Are Difficult to Remove
When a DTF transfer is pressed correctly, the hot-melt adhesive penetrates into the fabric fibers and bonds at a molecular level as it cools. This is what gives DTF transfers their durability — the bond is not just surface adhesion but a fused connection between the adhesive layer and the fiber structure of the garment.
To remove that bond, you need to either re-liquefy the adhesive (using heat) so it releases from the fibers, or break it down chemically (using a solvent). Neither method is guaranteed to leave the garment in perfect condition, and both carry a risk of fabric damage if done incorrectly. Cotton tolerates heat removal better than synthetic fabrics. Light-colored fabrics show residue and discoloration more than dark fabrics.
Understanding this upfront sets realistic expectations. Removal is sometimes possible. It is rarely invisible. See our guide to common DTF transfer mistakes for how to avoid placement errors before pressing.
Method 1: Heat Removal (Most Common)
Heat removal works by reactivating the hot-melt adhesive to its soft, pliable state — the same state it was in during pressing — which loosens the bond to the fabric fibers enough to peel the transfer away.
What You Need
● Heat press or household iron (heat press gives better control)
● Teflon sheet or parchment paper
● Tweezers or a seam ripper (for lifting the edge)
● Soft cloth for blotting residue
Step-by-Step Process
Step 1: Set your heat press to 280 to 300°F — slightly below normal pressing temperature. You want to soften the adhesive, not fully reactivate it, which can cause it to bond more deeply.
Step 2: Place a Teflon sheet or parchment paper over the transfer. Press for 8 to 10 seconds with medium pressure. This softens the adhesive layer.
Step 3: While the transfer is still warm — work quickly — use tweezers or a seam ripper to gently lift one corner of the transfer. Peel slowly and steadily at a shallow angle, keeping the peel as parallel to the fabric surface as possible. Pulling at a steep angle increases the chance of tearing the fabric or leaving adhesive chunks behind.
Step 4: If the transfer resists in any section, stop peeling and re-press that area for another 5 to 8 seconds. Do not force the peel — forcing tears fibers.
Step 5: After the main transfer is removed, inspect for adhesive residue. Residue appears as a slightly shiny, slightly stiff film on the fabric where the transfer was. Press the residue area through a clean parchment sheet two to three more times at the same temperature — the residue will transfer onto the parchment sheet, reducing what remains on the garment.
What to Expect
On cotton t-shirts, heat removal often removes 80 to 100% of the transfer. Some adhesive ghosting may remain — a subtle texture or slight sheen where the transfer was, visible when the fabric is stretched. On very light-colored shirts, this ghost may be faintly visible. On dark shirts, it is usually not noticeable.
On polyester and synthetic blends, heat removal is riskier. The lower heat tolerance of synthetic fabric means the fabric itself can be damaged at the temperatures needed to soften the adhesive. Test in a small area if possible and use the lowest effective temperature.
Method 2: Chemical / Solvent Removal
When heat removal does not fully clean up residue, or when the transfer cannot be heat-removed cleanly, a solvent can help break down the adhesive. This is typically used as a follow-up to heat removal rather than a primary method.
Solvents That Work on DTF Adhesive
● Rubbing alcohol (isopropyl alcohol, 90% or higher): The safest starting point. Apply to the residue area with a cloth, let sit for 30 seconds, then blot and rub gently. Works on partial residue after heat removal.
● Acetone (nail polish remover): More aggressive than alcohol. Effective on stubborn adhesive residue but can damage fabric dye on some colors and should never be used on synthetic fabrics. Test on an inside seam before applying to the visible garment area.
● Commercial heat transfer remover sprays: Products like Heatmaster Transfer Remover or similar commercial solvents are formulated specifically for heat transfer adhesive removal. More controlled than acetone and safer for fabric dye.
How to Apply
Apply a small amount of solvent to a clean white cloth — not directly to the garment, which risks uneven saturation. Dab and rub the residue area in small circular motions, working from the outside of the residue inward. Blot with a dry cloth to lift dissolved adhesive. Repeat until residue is minimized, then wash the garment immediately to remove solvent residue from the fibers.
Always test any solvent on an inconspicuous area of the garment — inside hem, under a collar — before applying to the visible print area. Solvents can pull fabric dye on some materials, leaving a bleached or discolored patch that is worse than the original adhesive residue.
When Removal Is Not Recommended
There are situations where attempting removal will damage the garment more than leaving the transfer in place:
● Thin or delicate fabrics (lightweight jersey, mesh, satin): The fabric cannot withstand repeated heat pressing or solvent exposure without distortion, discoloration, or tearing.
● Synthetic fabrics at high polyester content: The risk of heat damage to the fabric is too high relative to the adhesive softening temperature needed.
● Transfers applied to seam areas or over pockets: Seam structure makes even heat distribution impossible and removal will be uneven.
● Old or long-set transfers: A DTF transfer that has been washed many times has a more deeply cured adhesive bond that resists heat softening. Removal is significantly harder and less likely to be clean.
In these cases, consider covering the existing transfer with a new design rather than removing it. A new DTF transfer pressed directly over the old one — if the old transfer is flat and well-bonded — can work in many cases. The layered transfer will have a slightly more raised feel but will be visually clean.
Covering Instead of Removing
Pressing a new DTF transfer over an existing one is often a cleaner solution than removal when the original transfer is well-bonded, flat, and in approximately the right location. The new transfer bonds to the top surface of the existing transfer and to any surrounding fabric at the edges.
This works best when the new design is the same size or larger than the existing one — covering the old design completely. If the new design is smaller, edges of the old transfer may show around the perimeter. For design corrections or customer shirt fixes where the new design location overlaps the old one, covering is usually the better outcome than incomplete removal.
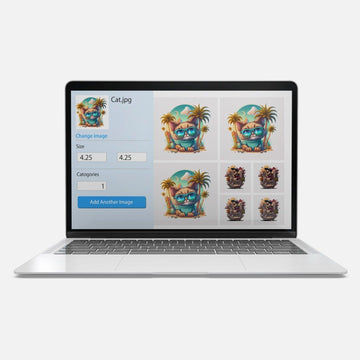
For placement entirely different from the original — moving a left chest logo to a right chest position, for example — removal or a new garment is the only option. Our gang sheet builder makes it easy to order replacement transfers for correction runs at minimal cost.
Preventing Removal Issues in the First Place
The best strategy for DTF transfer removal is rarely needing to do it. A few habits in production prevent most placement and quality errors:
● Use a placement guide or laser ruler on every shirt before pressing — do not eyeball position.
● Do a test press on a scrap shirt whenever trying a new fabric, new transfer supplier, or new press settings.
● Press a parchment sheet mock-up (no transfer, just paper cut to design size) first to confirm placement before committing.
● For customer orders, confirm design placement in writing before pressing — a quick text or email confirmation prevents the most expensive removal situations.
See our DTF transfer mistakes guide for a full checklist of the common errors that lead to removal attempts and how to prevent each one.
Frequently Asked Questions
Can you remove a DTF transfer from a shirt?
Yes, in many cases — but not always cleanly. Heat removal using a heat press at 280 to 300°F softens the adhesive enough to peel the transfer away. Cotton fabrics tolerate this best. Some adhesive ghosting or residue may remain after removal, especially on light-colored shirts. Synthetic fabrics carry a higher risk of heat damage during removal.
How do you get DTF transfer residue off a shirt?
After heat removal, adhesive residue can be reduced by pressing the area through parchment paper two to three more times — the residue transfers onto the parchment. For stubborn residue, rubbing alcohol applied with a cloth and blotted dry removes most of what remains. Commercial heat transfer remover sprays work well on persistent adhesive patches.
Can you iron off a DTF transfer?
A household iron can soften a DTF transfer for removal, but results are less consistent than a heat press because irons do not apply even pressure or maintain precise temperature across the transfer area. If using an iron, set it to the cotton or high setting, place parchment paper over the transfer, press firmly for 10 seconds, then peel quickly while still warm. Expect less clean removal than with a heat press.
Will removing a DTF transfer damage the shirt?
Removal carries a risk of fabric damage — particularly on delicate or synthetic fabrics. Cotton t-shirts tolerate heat removal well in most cases, with possible minor adhesive ghosting remaining. Polyester and synthetic blends risk heat scorch or fabric distortion at removal temperatures. Always test the removal process on an inconspicuous area before working on the visible print area of the garment.
Can you press a new DTF transfer over an old one?
Yes. A new DTF transfer pressed over a well-bonded existing transfer bonds to the top surface of the old transfer and surrounding fabric. This is often a cleaner outcome than attempted removal when the new design is the same size or larger than the original. The layered transfer will have a slightly more raised surface feel but will look visually clean.
Know Your Options Before You Press
DTF transfers are designed to be permanent — that durability is a feature, not a flaw. But when removal is necessary, heat and solvent methods give you real options on cotton and most cotton-blend fabrics. Work slowly, use the lowest effective temperature, and set realistic expectations for the outcome.
For ongoing production quality — transfers that bond cleanly on the first press and rarely need removal — order from a consistent supplier and follow the press settings in our DTF heat press settings guide. And when you need replacement transfers quickly, the gang sheet builder gets correction transfers ordered and in production within minutes.


