


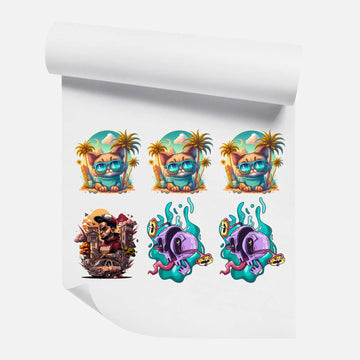




Hoodies are one of the highest-demand items in custom apparel — and one of the trickiest to press well. The thick fleece fabric, the seams, the hood, the kangaroo pocket, and the zipper (on zip-ups) all create variables that do not exist when you are pressing a flat t-shirt. Order your DTF transfers by size and quantity with the right dimensions, use the correct settings for fleece, and your hoodies will come out clean, vibrant, and durable. Get any of it wrong and you end up with weak adhesion, ink that peels at the edges, or visible pressure lines across the fabric.
This guide covers everything specific to pressing DTF transfers on hoodies — fabric behavior, correct settings, placement sizing for chest, back, and sleeve, how to handle design placement around pockets and zippers, common mistakes, and how to care for printed hoodies so the design holds up through repeated washing.
Why Hoodies Are Different from T-Shirts
The core challenge with hoodies comes down to two things: fabric thickness and surface irregularities.
Standard cotton t-shirts are thin, flat, and consistent across the press area. A hoodie's fleece or French terry fabric is significantly thicker — often 3 to 4 times the weight of a basic tee. That extra thickness absorbs heat, which means your press settings need to account for the time it takes heat to penetrate through to the fabric surface where the adhesive needs to bond.
Surface irregularities are the other issue. A kangaroo pocket creates a raised seam across the lower front of the hoodie. A zip-up hoodie has a zipper running down the center. Hood seams meet at the back yoke. Any of these features in or near your print area will cause uneven pressure, which means incomplete adhesion in those spots.
Understanding both of these factors before you press is what separates clean results from failed transfers.
DTF Heat Press Settings for Hoodies
Fleece and French terry fabrics need slightly adjusted settings compared to standard cotton. Here is what works for most hoodies:
● Temperature: 305–320°F (151–160°C)
● Press time: 13–17 seconds — longer than a t-shirt to allow heat to penetrate the thick fabric
● Pressure: Medium-firm to firm — heavier fleece needs more pressure to make full contact
● Peel: Follow your transfer's specified peel type (hot or cold)
The extended press time is the most important adjustment. At 12 seconds — the standard for a t-shirt — the adhesive on a thick hoodie may not fully activate because the heat has not had enough time to work through the fleece layers. At 15 to 17 seconds, you give the adhesive enough thermal energy to bond completely.
Always pre-press the hoodie for 3 to 5 seconds before applying your transfer. This removes moisture from the fleece — thick fabrics hold significantly more moisture than thin ones — and pre-heats the surface so your main press works from a warm starting point rather than a cold one. Skipping the pre-press is one of the most common causes of bubbling and weak adhesion on hoodies.
For a full breakdown of press settings across fabric types, see our complete DTF heat press settings guide.
Placement Sizing for Hoodies
Hoodie print areas are larger than t-shirt areas in most cases, but they have specific boundaries you need to respect — the pocket on pullover hoodies being the main one.
Front Chest Print (Pullover Hoodies)
On a pullover hoodie with a kangaroo pocket, the usable front print area sits above the pocket seam. The pocket typically starts around 8 to 10 inches below the collar, which limits your front design height. A design placed too low will overlap the pocket seam — an uneven surface that your press cannot bond across cleanly.
● Recommended front chest width: 10 to 13 inches wide
● Recommended front chest height: up to 6 to 8 inches tall (depending on where the pocket starts on your specific hoodie)
● Placement: centered horizontally, 3 to 4 inches below the collar
Measure the actual hoodie before ordering your transfer. Pocket position varies between brands and styles — a Gildan 18500 has a different pocket placement than a Champion or an independent brand hoodie.
Front Chest Print (Zip-Up Hoodies)
Zip-up hoodies split the front panel with the zipper, which eliminates the full-width chest print option. Your choices are a left chest print (logo or wordmark, 3 to 5 inches wide) or a design split across both panels — which requires very careful placement and is more complex to execute cleanly.
For most zip-up hoodie orders, a left chest print in the 3 to 4 inch range is the practical choice. Position it 4 to 5 inches below the collar and 1 to 2 inches from the zipper edge. Check our artwork and sizing FAQ if you need guidance on how to set up small logo files at the right resolution.
Back Print
The back of a hoodie is the cleanest press surface — no pocket, no zipper, and a large flat area. Back prints on hoodies can go significantly larger than on t-shirts because the back panel is typically wider and taller.
● Full back print: 12 to 15 inches wide
● Standard back print: 10 to 12 inches wide
● Placement: centered horizontally, 3 to 4 inches below the collar seam
Watch the seam where the hood attaches to the back yoke — it runs horizontally across the upper back and can create uneven pressure if your design starts too close to it. Keep your design at least 2 inches below that seam for clean adhesion across the top edge of the transfer.
Sleeve Print
Sleeve prints on hoodies follow the same principles as sleeve prints on t-shirts, but the thicker fabric means you need the same extended press time as the body.
● Upper sleeve print: 3 to 4 inches wide, centered on the front face of the sleeve
● Full sleeve strip: 3 to 4 inches wide, running down the length of the sleeve
Use a sleeve board or roll up a firm towel inside the sleeve to create a flat pressing surface. Pressing a sleeve flat on a platen without support inside creates uneven pressure and a crease line where the fabric folds.
Handling the Kangaroo Pocket
The kangaroo pocket on pullover hoodies is the biggest positioning challenge in hoodie decoration. You have three options:
● Print above the pocket: The simplest and most reliable approach. Keep your design within the area above the pocket seam. Clean press surface, no complications.
● Print on the pocket itself: The pocket is a flat-ish surface when the hoodie is laid out, but the seam around the pocket edge creates pressure variation. If you press directly over the pocket, use a heat-resistant pad inside the pocket to raise it level with the surrounding fabric. Press carefully and check all edges of the transfer after peeling.
● Print spanning the pocket seam: Not recommended. The seam creates a step in surface height that the press cannot bridge evenly. The portion of the transfer over the seam will not bond cleanly and will peel early.
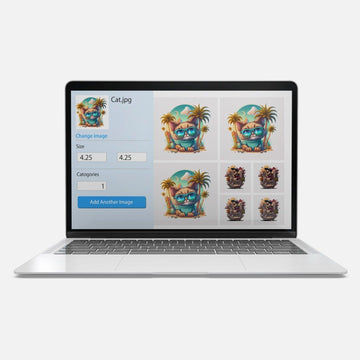
For gang sheets with multiple hoodies in one order, design your placement so it consistently falls above the pocket. Use the DTF gang sheet builder to size each front chest transfer to the correct dimensions before ordering — this avoids having to trim or reorder transfers that are too tall for the available press area.
Pressing a Zip-Up Hoodie
The zipper on a zip-up hoodie creates a ridge down the center of the front panel. If your design is centered on the chest and crosses the zipper, the zipper ridge will prevent even pressure across the full transfer and you will get a gap or lifted area along the zipper line.
For any design that needs to sit near the zipper, use a heat-resistant silicone pad or a pressing pillow placed underneath the design area to raise the fabric level with the zipper height. This equalizes the pressure surface and lets the platen make even contact across the full transfer.
Alternatively, keep your design entirely to one side of the zipper — a left chest placement avoids the problem entirely and is a clean, professional look for branded zip-up hoodies.
Cotton-Poly Blend vs 100% Cotton Hoodies
Most hoodies are either 100% cotton fleece or a cotton-polyester blend — commonly 50/50 or 80/20. The blend affects your press settings.
100% Cotton Fleece
Cotton is the most forgiving for DTF. Use the upper end of the hoodie temperature range — 315 to 320°F — and press for 15 to 17 seconds. Cotton fleece handles heat well and produces vibrant, accurate colors.
Cotton-Poly Blends (50/50, 80/20)
The polyester content in blended hoodies means you need to moderate your temperature. Stay at 305 to 310°F and press for 13 to 15 seconds. Higher temperatures on polyester content can cause the fabric to develop a sheen or subtle texture change from the heat. Use a cover sheet to protect the fabric surface from direct platen contact.
Performance and Lightweight Fleece
Some branded hoodies use lightweight performance fleece or tech fleece with a higher synthetic content. Treat these like polyester — lower temperature (295 to 305°F), shorter press time (12 to 13 seconds), and always test on a sample piece before pressing a full order.
Common Mistakes When Pressing DTF on Hoodies
Skipping the pre-press
Thick fleece holds moisture. Pressing without pre-heating the fabric first leads to steam bubbles under the transfer and inconsistent adhesion. Always pre-press for 3 to 5 seconds before applying the transfer.
Standard t-shirt press time on fleece
Ten to twelve seconds is not enough for thick hoodie fabric. The heat does not reach the bonding temperature at the fabric surface in time. Add 3 to 5 extra seconds compared to your standard t-shirt settings.
Pressing over the pocket seam
The seam creates an uneven surface the platen cannot bridge. The transfer will appear bonded in the center but lift at the portion crossing the seam. Keep designs above the pocket or use a padding solution to level the surface.
Insufficient pressure on thick fleece
Fleece compresses under pressure, which is actually useful — it creates a firm pressing surface. But you need to apply enough force to compress it evenly. Light pressure on fleece produces a soft, spongy contact that does not bond the adhesive properly at the edges.
Not using a cover sheet
Pressing fleece directly against a bare platen can mark the fabric surface with heat lines and leave adhesive residue on the platen. Always use parchment paper or a silicone cover sheet between the platen and your transfer.
Wash Care for DTF-Printed Hoodies
Hoodies get washed frequently and often at higher temperatures than lighter garments. Following the right wash care keeps DTF prints looking good through a full season of wear.
● Wash cold — hot water is the fastest way to degrade DTF adhesive bonds
● Turn inside out before washing to protect the print from abrasion against other garments
● Avoid fabric softeners — they can weaken the adhesive bond over time
● Tumble dry on low heat or air dry — high heat dryer cycles are hard on DTF transfers on any fabric, and thick fleece retains heat longer
● Do not dry clean — the solvents used in dry cleaning are not compatible with DTF adhesive
With proper care, DTF prints on hoodies hold up through many wash cycles without significant fading or edge peeling. For a full wash care guide covering all DTF garment types, see our DTF wash and care guide.
Frequently Asked Questions
What temperature should I use for DTF transfers on hoodies?
305 to 320°F depending on fabric content. Use the higher end for 100% cotton fleece and the lower end for cotton-poly blends. Always pre-press the hoodie for 3 to 5 seconds before applying the transfer to remove moisture and pre-heat the fabric.
How long should I press a DTF transfer on a hoodie?
13 to 17 seconds — longer than a t-shirt because the thick fleece absorbs heat and requires more time for the adhesive to fully activate. Use the longer end of that range for heavyweight fleece hoodies.
Can I print over the kangaroo pocket on a pullover hoodie?
You can print on the pocket itself if you use a pad inside the pocket to level the surface, but printing over the pocket seam is not recommended — the seam creates a height difference the platen cannot bridge evenly. The safest placement is above the pocket entirely.
Will DTF transfers crack on hoodies after washing?
Not if pressed correctly and cared for properly. The main risk factors are pressing at too low a temperature (incomplete adhesion), hot water washing, and high-heat drying. Cold water washing, low-heat drying, and turning inside out before each wash will keep DTF prints on hoodies looking clean for a long time.
Get Your Hoodie Order Right
DTF transfers on hoodies produce some of the most striking results in custom apparel — the larger canvas, the premium feel of a printed fleece design, and the full-color capability of DTF make for finished products that customers love. The key is accounting for the fleece-specific variables: extended press time, pre-press step, correct placement relative to the pocket or zipper, and firm pressure.
Before your first hoodie run, test your settings on a sample piece. Our DTF transfer sample pack is a low-cost way to press a test transfer on your actual hoodie fabric before committing to a full order. When you are ready to build your order, the DTF gang sheet builder lets you arrange all your hoodie designs at the right sizes on a single sheet. And if you have questions about sizing or setup, our video tutorials cover the pressing process in detail, or reach us through the contact page for direct help.


