

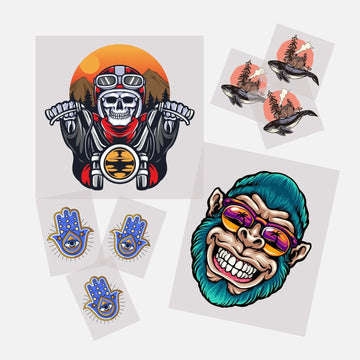




Most people think of t-shirts when they think about DTF transfers, but the same technology that produces sharp, durable prints on cotton tees works equally well on canvas tote bags, zippered pouches, makeup bags, aprons, and a wide range of fabric accessories. The canvas tote bag market has grown consistently as more brands, events, and small businesses look for reusable merch alternatives to paper or plastic bags.
Getting a clean DTF transfer on a tote bag is not exactly the same as pressing a shirt. Canvas is thicker than most apparel fabrics, often has seams or stiff handles that create uneven pressing surfaces, and may have a texture that affects how the transfer lays down. This guide covers everything you need to know — heat press settings, surface prep, how to handle seams and handles, and what to expect from DTF on different types of canvas.
Why DTF Works on Canvas Tote Bags
Canvas tote bags are typically made from 100% cotton canvas or a cotton-poly canvas blend. Both fabric types bond cleanly with DTF hot-melt adhesive during pressing. The adhesive in a DTF transfer activates and fuses to cotton and cotton-blend fibers the same way it does on a t-shirt — the process is fabric-agnostic as long as the surface can tolerate the pressing temperature and the fabric lies flat enough for even contact.
The key advantage DTF has over other methods on canvas tote bags is color versatility. Sublimation requires polyester-coated canvas and cannot reproduce accurate colors on natural cotton canvas. Screen printing works but requires setup fees and minimum quantities that make it impractical for small batches. DTF transfers work on natural cotton canvas in any quantity — one bag or one hundred — with full-color designs that include photographic detail, gradients, and white ink on natural or colored canvas.
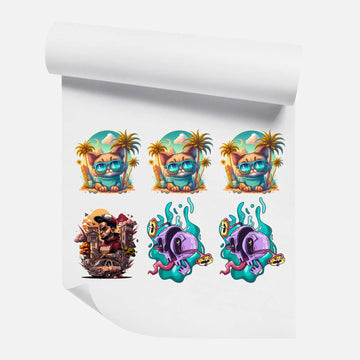
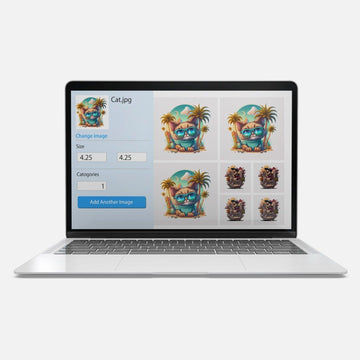
For Etsy sellers and small business owners producing custom tote bags, DTF transfers combined with a heat press is one of the most flexible production setups available. Our gang sheet builder makes it easy to tile tote bag designs efficiently on a single film sheet to minimize cost per transfer.
Best Canvas Tote Bag Types for DTF Transfers
Not all tote bags press equally. The structure and fabric weight of the bag affects how cleanly a DTF transfer bonds.
Flat-Panel Canvas Totes
Standard flat-panel canvas tote bags — the kind with simple handles stitched to the top of a single-layer or gusseted bag body — are the easiest to press. The front panel lays flat across the heat press platen, providing even surface contact across the entire transfer area. These are the most forgiving canvas item to work with and produce the cleanest results for beginners.
Common examples include the popular 5 oz and 6 oz natural cotton canvas tote bags from suppliers like Baggu, Liberty Bags, or similar brands. These press cleanly at standard DTF settings with no special prep beyond pre-pressing to remove moisture.
Gusseted Canvas Totes
Gusseted totes have a fold at the base that gives the bag depth. The front panel is still flat, but the side gussets and the bottom fold can interfere with pressing if the bag is not positioned carefully. Position the bag so the front panel is centered on the platen, with the gusset folds tucked back and not under the platen. A flat, firm platen that reaches all the way to the panel edges is important here.
Canvas Zippered Pouches and Makeup Bags
Flat canvas zippered pouches — cosmetic bags, pencil cases, small accessories — can be pressed with DTF transfers as long as the front panel lies flat and the zipper is not under the platen during pressing. Open the zipper slightly to allow air to escape during pressing, or stuff the pouch with a silicone insert to create a firm, even pressing surface inside. Without something firm inside, the canvas can compress unevenly and cause adhesion issues.
Canvas Aprons
Canvas aprons press well for a chest-area design using a standard clamshell press. The main challenge is the neck tie and waist ties, which need to be tucked back and out of the platen area during pressing. Use heat-resistant tape to temporarily secure ties if needed. Position the apron so the design area is centered and flat on the platen before closing.
Structured or Laminated Canvas Bags
Bags with laminated interiors, foam padding, or rigid structure panels are more difficult to press cleanly. The rigid structure prevents the canvas from making full contact with the platen, which creates air gaps that lead to uneven adhesion. For heavily structured bags, test on a sample piece before pressing a full order. In some cases, a pillow press attachment helps by conforming to the bag's surface rather than requiring the bag to lie completely flat.
Heat Press Settings for Canvas Tote Bags
Canvas is a heavier, denser fabric than standard t-shirt cotton and requires slightly adjusted press settings. The general baseline for DTF on canvas:
● Temperature: 305–320°F (152–160°C)
● Time: 12–15 seconds (slightly longer than a standard shirt to allow heat to penetrate the heavier canvas)
● Pressure: Medium-firm (the canvas should compress slightly under the platen — too light and the adhesive does not bond evenly)
These are starting points. Canvas weight, bag structure, and your specific heat press model all affect the right settings. Always do a test press on a scrap piece of canvas before pressing a production run. If the transfer does not bond cleanly at 12 seconds, add 2 seconds before adjusting temperature. For more detail on heat press settings across different fabric types, see our DTF heat press settings guide.
Step-by-Step: Pressing a DTF Transfer on a Canvas Tote Bag
Step 1: Pre-Press the Canvas
Before applying a DTF transfer, pre-press the canvas bag for 3 to 5 seconds with the heat press closed. This removes moisture from the canvas and flattens any surface texture or wrinkles that could interfere with even transfer contact. Canvas absorbs ambient humidity, and moisture under the transfer during pressing creates steam that lifts the adhesive unevenly.
Step 2: Position the Bag on the Platen
Slide the front panel of the tote bag over the platen so it lies flat with the canvas surface facing up. Tuck handles back behind the platen or secure them with heat-resistant tape so they do not fall under the press during closure. For bags with gussets, fold the side gussets back so only the flat front panel is under the platen.
Step 3: Position the Transfer
Place the DTF transfer on the canvas panel, printed side down, adhesive side against the fabric. For standard tote bag placement, most designs sit centered 2 to 4 inches from the top edge of the bag. Use a ruler or placement guide to check position before pressing — once the press closes you cannot reposition without risking adhesion issues.
Step 4: Press at Temperature and Time
Close the heat press and press for 12 to 15 seconds at 305 to 320°F with firm, even pressure. The pressing time for canvas is slightly longer than a standard shirt because the heavier fabric takes more time to reach the right temperature at the transfer interface. Keep pressure consistent throughout the press cycle.
Step 5: Peel and Finish
After pressing, peel the film per the transfer type — hot peel or cold peel, as noted on your transfer order. Peel slowly and smoothly from one corner, keeping the film as parallel to the canvas surface as possible. After peeling, cover the design with a Teflon sheet or parchment paper and press again for 3 to 5 seconds to set the adhesive completely and smooth the surface of the transfer. This second press step is especially important on canvas because the textured surface can leave small gaps in adhesion that the final press closes.
Color and Design Considerations for Canvas Tote Bags
Natural Canvas and Colored Canvas
Natural (undyed) canvas has a warm tan or off-white color that affects how lighter design colors appear. If your design includes areas that rely on a pure white — a white background, white text, white shapes — the DTF transfer's white underbase ink handles this correctly by printing an opaque white layer first. The final result is accurate color regardless of the canvas base color.
For colored canvas bags — black, navy, forest green, burgundy — the white underbase is essential. DTF transfers include this white layer by default, which is why they outperform many other methods on non-white canvas surfaces. A design that looks identical on a white shirt also looks identical on a black canvas tote bag.
Design Sizing for Tote Bags
Standard tote bag design sizes depend on the bag dimensions. For a typical 15 x 16 inch canvas tote, a full front design usually runs 9 to 12 inches wide and 8 to 10 inches tall. Smaller designs at 4 to 6 inches work well for a lower-center or bottom-corner placement — common for logo placements on market tote bags.
Prepare your artwork as a PNG with a transparent background at 300 DPI minimum at the intended print size. If you are unsure about sizing, our DTF artwork preparation guide covers exactly how to format files for the cleanest possible transfer reproduction.
DTF vs Other Methods for Custom Tote Bags
DTF vs Screen Printing on Tote Bags
Screen printing on canvas tote bags produces excellent results at high volume, but the setup cost makes it impractical for small batches. A 1-color screen print setup charge and per-shirt print fee typically makes small runs of under 24 to 48 bags expensive per unit. DTF transfers have no setup fee and no minimum, making them more cost-effective for smaller quantities or designs with multiple colors.
DTF vs Sublimation on Tote Bags
Sublimation on canvas tote bags only works reliably on bags made from high-polyester canvas — at least 65% polyester — and even then, colors can appear muted on fabric that is not 100% polyester white. Natural cotton canvas bags, which are the most popular style, cannot be sublimated correctly. DTF transfers work on any cotton or cotton-blend canvas without restriction.
DTF vs HTV on Tote Bags
Heat Transfer Vinyl (HTV) on canvas tote bags works for simple, single-color or limited-color cut designs, but HTV cannot reproduce photographic detail, fine gradients, or complex multi-color artwork. DTF transfers have no color or detail limitations. For logo-only or text-only designs, HTV is a reasonable option; for anything more complex, DTF is the better choice. Our DTF vs HTV comparison breaks down the full differences between the two methods.
Custom Tote Bags as Branded Merch and Event Items
Canvas tote bags with DTF transfers are popular for several specific use cases beyond individual custom orders. Market and farmers market vendors use custom tote bags as branded packaging and promotional items. Event organizers at conferences, weddings, school events, and fundraisers order custom tote bags as attendee giveaways or pre-sold merchandise. Small businesses selling handmade products use branded canvas pouches and bags as part of their packaging experience.
For all of these use cases, DTF transfers offer a practical path to professional-looking branded canvas items without the volume requirements or setup costs of traditional commercial printing. If you are building a collection of branded items for your business — shirts, hats, and tote bags all carrying the same logo — the gang sheet builder lets you arrange all three item types on a single sheet to reduce cost per piece.
Frequently Asked Questions
Do DTF transfers stick to canvas tote bags?
Yes. DTF transfers bond well to natural cotton canvas and cotton-poly canvas blend bags. The hot-melt adhesive activates and fuses to cotton fibers cleanly with proper heat press settings (305–320°F, 12–15 seconds, medium-firm pressure). Pre-pressing the bag to remove moisture and doing a brief finishing press after peeling improves adhesion on heavier canvas weights.
Can I use a regular iron to apply DTF transfers to a tote bag?
A heat press produces significantly better results than a household iron on canvas tote bags. Canvas is thicker than apparel fabric and requires consistent, even pressure across the full transfer area — something a household iron cannot reliably deliver. An iron also cannot maintain a precise temperature the way a heat press does. For production-quality results, a dedicated heat press is the right tool.
What size design works best for a standard canvas tote bag?
For a standard 15 x 16 inch canvas tote bag, a full front design in the 9 to 12 inch wide range works well and makes a visual impact. For a more subtle logo placement, 4 to 6 inches centered or placed lower on the bag panel is a common choice. Prepare artwork at 300 DPI minimum at the intended print size for the sharpest results.
Will a DTF transfer on a canvas tote bag last through washing?
Yes. A properly applied DTF transfer on canvas holds up through repeated washing when cared for correctly — machine wash cold, inside out or with the print side protected, low-heat or air dry. Avoid hot water and high dryer heat, which break down the adhesive bond over time. With proper care, DTF transfers on canvas tote bags last as long as the bag itself. See our DTF wash and care guide for full care instructions.
More Than Just T-Shirts
DTF transfers work across a wider range of fabric items than most decorators initially realize. Canvas tote bags, zippered pouches, aprons, and fabric accessories all press cleanly with the same equipment and process used for apparel. If you are already pressing shirts and want to expand your product line without adding new equipment, canvas bags are the natural next step.
Browse available transfer options and start building your layout in the gang sheet builder, or order a sample pack to test DTF on your canvas bags before committing to a full production run.


