


Introduction
The world of DTF printing process is now quite popular among the garments and custom apparel industry. In the past years, there has been a significant change in the world of decoration industry. Previously, the process of screen printing and vinyl transfers have dominated the market. But now the scenario has changed.
The extensive physical setups that limits the specific types of fabrics help the decorators to successfully use them. However, a newer technique has taken its place center stage due to the immense versatility and high-quality visual results.
Are you looking into how complex, full-color designs make their way onto t-shirts so seamlessly? Learning about the DTF printing process is the perfect place to start with. This blogpost walks you through every single operational step. This is to make it simple to understand about how a digital graphic transforms into a permanent, washable design on a piece of clothing.
Let us break down the process through a step-by-step guide, so that businesses can continue getting perfect prints every single time they use the DTF printing machine.
How to Understand the Basics: A Brief Overview
When people ask- what is DTF printing, they mean what the process is all about. They usually look for frank answers that are free of industry jargon. The DTF printing process stands for Direct-to-Film procedure. Unlike the process of direct-to-garment (DTG) printing, where the liquid ink is sprayed directly onto a cotton shirt, this method first prints a digital design onto a specialized thin plastic film. Once the wet design is fully printed and cured on the plastic film, it is transferred to the fabric using a standard commercial heat press.
If you are still wondering whether it is wise to choose DTF printing over those traditional methods, the answer lies in its extreme flexibility. It works wonderfully on 100% cotton, heavy polyester, nylon, rayon, and various complex fabric blends.
Sublimation: Another widely used method is the process of sublimation, which only works on the polyester materials that are light-colored. DTF works flawlessly regardless of whether the target garment is dark or it is light-colored.
Screen Printing: On the other hand, screen printing requires burning of different physical screens for every single color in your artwork. With the removal of the strict limitations, this modern printing method has become highly popular among both weekend crafters and the large-scale clothing brands which aim to print vibrant, full-color graphic tees.
What are the Tools Required for the Job
Before we begin with the process of DTF printing, it is important to dive into the operational steps, you need to know about the specific supplies related to both hardware and chemical matters. One cannot just use any form of home paper printer for this job. Instead, you need the right industrial tools to get the work done.
- Printer hardware: A specialized inkjet printer, that is built from the scratch, is designed to handle heavy textile pigment inks and those plastic roll films.
- PET Film: The digital design is applied directly to this frosted transfer film. It is specially coated in order to hold the wet ink without any cause of smudging.
- Specialized Inks: Standard CMYK colors like the Cyan, Magenta, Yellow, Black including a specific dense white ink is used to serve as one of the thick base layers.
- Adhesive Powder: This is a kind of granulated hot-melt powder that acts as a strong glue which binds the dried ink to the fabric fibers.
- Curing Oven and Heat Press: With an isolated heat source users can melt the powder into a gel kind of a substance that is meant especially for heavy-duty commercial heat presses which helps in transferring the image onto a shirt.
Knowledge Tip: Having reliable hardware is important because it directly impacts the visual quality of your final product. It also analysed how accurately the printheads dispense the liquid onto the plastic.
A Complete Step-by-Step Breakdown of the DTF Printing Process
The DTF printing process involves several critical stages. It skips or rushes any of them which results in a poor transfer of fabric that might show up crack points or peel off certain portions after a few wash in the washing machine.
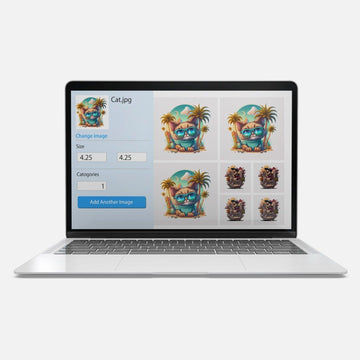
Step 1: Preparing Your Design and the DTF printing machine
- You require a high-resolution and a transparent graphic file.
- You will use specialized RIP software to communicate the graphic data to your printer.
- This software dictates exactly how much a white ink is used to lay down the colors.
- Before hitting the print button, verify that your DTF printing machine provides printheads that are completely clean by running a quick nozzle check on a scrap piece of film.
Knowledge Tip: Agitating the white ink tank is also a mandatory habit. As the heavy titanium dioxide pigments naturally the ink settles at the bottom of the tank overnight.
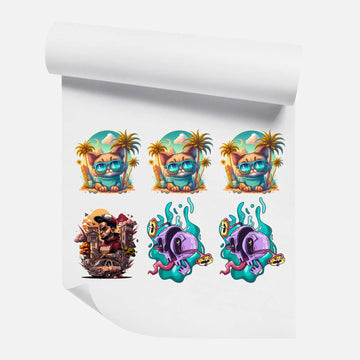
Step 2: Printing on the Film
- Once the machine is prepared and the nozzles are ready to fire, send your digital job over.
- The printer will lay down the colored inks first, onto the coated side of the PET film directly.
- Immediately over those bright colors, the printer deposits a thick, solid layer of white ink.
Knowledge Tip: This specific white layer serves as an opaque background. It makes the colors pop brilliantly if put onto the garments that are black or navy-blue in color.
Step 3: Application Of the Adhesive Powder
- If the ink on the plastic film is still wet, you must apply the hot melt adhesive powder. This step is highly important for production.
- You can do the same by pouring the granulated powder directly onto the wet film.
- The next is to shake off the excess into a plastic bin, or use an automated shaker machine if you run a high-volume warehouse shop.
Knowledge Tip: The goal is to coat the wet ink perfectly while leaving zero powder on the blank areas of the film.
Step 4: Cure the Powder Gently
- After you apply the powder, the film is pushed into a curing oven.
- The intense heat melts the loose powder. This turns it into a rubbery, sticky gel that permanently fuses to the ink.
- A proper curing process in the DTF printing process takes roughly about 2 to 3.5 minutes at an approximate temperature of 160 degrees Celsius.
- When you see that the powder turns from a sugary texture into a smooth, slightly glossy surface, know that it is ready for use.
Step 5: Heat Pressing the Fabric
- Next, pre-press a blank color t-shirt for almost 6 seconds in order to remove any hidden moisture and smooth out wrinkles.
- Place the complete printed film onto the shirt but face the design facing down against the fabric.
- Lower the heat press.
- Typically, you will press the shirt at 150 to 160 degrees Celsius for 15-16 seconds under firm and heavy pressure.
Step 6: The Cold Peel Process
- There are transfer films that require a cold peel.
- One must wait for the hot shirt to cool down completely to room temperature.
- Once cool, grab a corner and peel the plastic off smoothly.
- The ink remains behind on the shirt.
- Many experienced operators complete the overall application within the second press.
Knowledge Tip: By placing a piece of parchment paper over the fresh design you can press it for another 5-6 seconds so that you get a soft graphic's physical feel.
What are the Common Mistakes One should avoid
- One major mistake in the professional DTF printing services is that they fail to manage the humidity in the workspace strictly.
- If the air in the room is too dry, the liquid ink will dry inside the microscopic printheads. This might cause permanent clogging that ends up being expensive to fix.
- Another frequent error is applying too much or too little powder during the coating stage.
- Lastly, many impatient users rush the cooling phase. Peeling a cold-peel film while it is still warm will pull the fresh ink right off the fabric. This will ruin the blank shirt completely.
Why Choose to Outsource Your Production?
When you hire professional DTF printing services, you successfully manage to skip the steep learning curve and the massive upfront financial investment.
Using the professional DTF printing process means you can focus solely on aspects like marketing, designing new graphics, rather than dealing with daily problems.
Concluding Lines
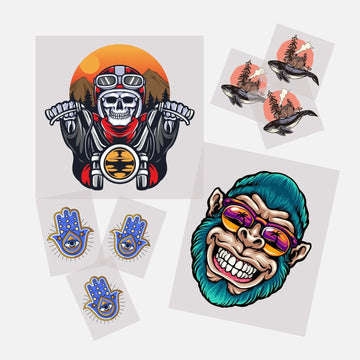
Creating custom apparel has never been more accessible or exciting for independent creators. Whether you invest time and money in operating your own business or partner with professional DTF printing services to scale your business quickly, this garment decoration method proves to be the most effective way to produce custom apparels.
DTF Print is one such specialized company which runs massive, industrial-grade setups, helping businesses to maintain their daily output in a high and consistently, incredibly stretchable, and durable.
Frequently Asked Questions (FAQs)
Q1. How long do the prints typically last on a t-shirt?
Ans: When applied correctly and in accordance with the exact operational guidelines, these digital designs are incredibly durable and long-lasting.
Q2. Can I use a standard iron instead of a commercial heat press?
Ans: While it is technically possible to use a standard household iron for very small, experimental hobby projects, it is highly discouraged if you want to sell the final product to a customer.


