


Hats are one of the most popular items in custom apparel — and one of the trickiest to decorate well. Embroidery has been the go-to method for decades, but DTF transfers have changed what is possible on structured headwear. Full-color graphics, photographic detail, gradients, and fine text are all achievable on a hat with DTF, and the process is faster and more flexible than embroidery for most designs.
But pressing a hat is not the same as pressing a flat t-shirt. The curved surface, the structured panels, the seams and buttons — all of it requires a different approach. This guide covers everything you need to know to get clean, durable DTF prints on hats: which hat styles work, what equipment you need, how to size your artwork, what settings to use, and the mistakes that cause most failures.
Can You Put DTF Transfers on Hats?
Yes — DTF transfers adhere to hats just as well as they do to flat garments, provided you use the right equipment and technique. The adhesive in a DTF transfer bonds to fabric through heat and pressure, and hat fabrics — cotton twill, polyester, wool blends — respond well to that process.
The challenge is not the transfer itself. It is achieving consistent heat and pressure across a curved, three-dimensional surface. A flat platen press presses down evenly on a flat shirt. Press it onto a curved hat panel and you get uneven contact — the center might bond perfectly while the edges lift within a few washes.
The solution is the right equipment, which we will cover in detail below. With a hat press or a curved platen attachment, DTF on hats produces results that are clean, durable, and far more detailed than embroidery can achieve on complex artwork.
Which Hat Styles Work Best with DTF
Not every hat style is equally well-suited to DTF transfers. The key factor is how flat and accessible the front panel is.
Structured Baseball Caps (Best Option)
Six-panel and five-panel structured baseball caps with a firm front panel are the ideal canvas for DTF transfers. The structured front panel sits relatively flat when placed on a hat press platen, giving you consistent contact across the print area. The buckram backing behind the front panel helps the fabric hold its shape under heat. Most custom headwear orders use this style, and it is where DTF on hats performs most reliably.
Unstructured Baseball Caps
Unstructured caps have a soft, unsupported front panel that collapses easily. They are harder to press consistently because the panel does not hold a flat position under the platen. With care — and a good hat press with a properly shaped platen — DTF on unstructured caps is achievable, but expect more prep time to position the hat correctly and more test presses to dial in your results.
Trucker Caps
Trucker-style caps with a foam front panel work well with DTF. The foam provides firm, consistent support behind the fabric, similar to structured twill caps. The mesh back panels are not suitable for DTF transfers, but the foam front is a good pressing surface.
Beanies and Knit Hats
Beanies are a different category. The stretchy, knit fabric moves during pressing and the rounded shape makes consistent contact difficult without a specialized form. DTF transfers on beanies are possible but require a rounded hat form or a rolled towel inside the beanie to create a firm pressing surface. Results are less predictable than on structured caps, and the stretchy fabric can cause the transfer to crack or peel when the beanie is worn and stretched.
Bucket Hats
Bucket hats have a flat crown that can be pressed like a flat garment if you remove the hat from its structure, press, then reassemble. The brim prevents standard hat press positioning. Some decorators press bucket hat panels before assembly. As a finished hat, bucket hats are less practical for DTF than baseball caps.
Equipment: Why You Need a Hat Press
This is the most important practical point in this entire guide. You cannot press DTF transfers onto a hat using a standard flat clamshell or swing-away press and expect consistent results.
A flat platen contacts the curved hat panel only at the highest point — the very center — and pressure decreases as you move toward the edges. The result is a transfer that looks fine in the middle but has lifted or unbonded edges that start peeling after a few washes or even during the peel step.
A dedicated hat press solves this. Hat presses have a curved lower platen designed to match the curve of a hat's front panel. When you place the hat on the curved platen and bring the upper heating element down, the pressure distributes evenly across the full print area.
Hat Press Options
● Dedicated hat press: A standalone press built specifically for caps. These have a cylindrical or curved lower buck and an upper heating element that matches the curve. They are the most reliable option for consistent hat production.
● Hat platen attachment: Many heat press brands offer curved hat platen attachments that replace the standard lower platen on a swing-away press. This is a cost-effective option if you already have a quality press and want to add hat capability.
● Cap press attachment: Some all-in-one heat press systems include a cap press attachment as part of their accessory lineup. Performance varies by brand — test thoroughly before running production.
If you are doing more than occasional hat orders, a dedicated hat press is worth the investment. Inconsistent pressure is the number one cause of DTF hat transfer failures, and the right equipment eliminates that variable entirely.
Sizing Your DTF Transfer for Hats
Hat print areas are significantly smaller than shirt print areas, and getting the size right matters both for aesthetics and for fit within the panel.
Standard Hat Print Area
● Front panel width: 4 to 5 inches wide maximum for most structured baseball caps
● Front panel height: 2.5 to 3.5 inches tall, depending on cap style and panel height
● Recommended starting size: 4 inches wide × 2.5 inches tall for most adult caps
Side Panel and Back Panel
● Side panel prints are smaller — typically 2 to 3 inches wide
● Back panel above the closure: 2 to 3 inches wide, limited height
Always measure the actual hat you are decorating before finalizing your transfer size. Panel dimensions vary between brands and styles. A transfer that fits a Yupoong 6006 perfectly may be slightly too wide for a lower-profile cap with narrower panels.
When building your transfer file, prepare it at 300 DPI in RGB color mode as a transparent PNG — the same requirements as any DTF artwork. For sizing guidance and file specs, see our artwork and sizing FAQ.
DTF Heat Press Settings for Hats
Hat press settings differ slightly from flat garment settings because of the curved platen, the structured panel, and the buckram or foam backing that sits between the fabric and the platen.
● Temperature: 300–315°F (148–157°C)
● Press time: 12–15 seconds
● Pressure: Medium-firm — slightly firmer than flat garments to account for the curved surface
● Peel: Follow your transfer's specified peel type (hot or cold)
The buckram or foam backing in structured caps acts as an insulator, so you may need to press at the higher end of the temperature range or for a full 15 seconds to get enough heat transfer through the backing material to fully activate the adhesive.
Always use a cover sheet — parchment paper or a silicone sheet — between the transfer and the heating element. This protects the transfer surface and prevents adhesive from transferring to your hat press platen.
For a full breakdown of DTF press settings by fabric type, see our complete DTF heat press settings guide.
Step-by-Step: How to Press a DTF Transfer on a Hat
Step 1: Preheat your hat press
Allow your hat press to fully reach the target temperature before pressing. Many presses take 5–10 minutes to stabilize at the set temperature. Pressing before the platen is fully heated produces inconsistent results.
Step 2: Pre-press the hat
Place the hat on the curved platen and press for 3–5 seconds without a transfer. This removes moisture from the panel and pre-shapes the fabric slightly to the platen curve. Moisture in the fabric is a common cause of bubbling and poor adhesion.
Step 3: Position your transfer
Center the transfer on the front panel. For left-chest-style placement on a hat, position it slightly left of center. Use heat-resistant tape to hold the transfer in place if needed — hat fabric does not stay put as easily as a flat shirt on a platen.
Step 4: Cover and press
Place your cover sheet over the transfer and bring the hat press down. Apply firm, even pressure and hold for 12–15 seconds at 305–315°F.
Step 5: Peel
Remove the cover sheet and peel the carrier film according to your transfer's peel type — immediately if it is a hot peel transfer, or after the transfer cools if it is a cold peel. Peel slowly at a low angle, not straight up.
Step 6: Inspect and finish press (optional)
Check the edges of the transfer for any areas that did not fully bond. If you find spots, cover with parchment paper and re-press for 5 seconds. A finish press over the entire design with a cover sheet can also produce a slightly smoother, more embedded look.
Common Mistakes When Pressing DTF on Hats
Using a flat press instead of a hat press
The most common and most damaging mistake. A flat platen cannot make consistent contact with a curved surface. The edges of your transfer will not bond properly no matter how long you press. Use a hat press or a curved platen attachment.
Skipping the pre-press
Hat fabric holds moisture more than flat garments because of the structured layers. Skipping the pre-press step leaves moisture in the panel that creates steam during the main press — resulting in bubbles under the transfer and weak adhesion.
Transfer too large for the panel
Oversized transfers extend onto the seams, the button, or the brim — areas where the press cannot make proper contact. Keep your transfer within the flat print area of the front panel, typically no wider than 4.5 inches on a standard adult baseball cap.
Insufficient pressure
Hat platens need firm pressure to make full contact with the fabric across the curve. If your press closes too easily or you feel minimal resistance, increase the pressure. Light pressure means incomplete bonding at the edges.
Peeling too fast or at the wrong angle
Rushing the peel tears the transfer before the adhesive has fully set. Always peel slowly at a shallow angle — close to parallel with the hat surface — not straight up. On a cold peel transfer, wait until the film has cooled completely.
DTF vs Embroidery for Hats: A Quick Comparison
Embroidery has been the standard for hat decoration for good reason — it is durable, professional-looking, and widely recognized as a quality finish. But it has real limitations that DTF does not share.
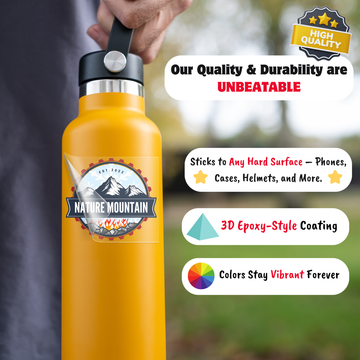
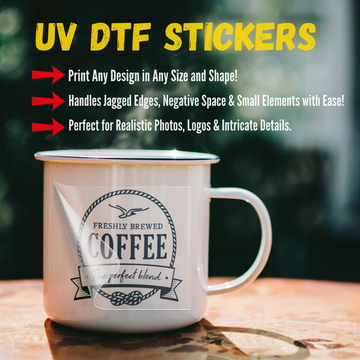
● Design complexity: Embroidery is limited to solid fills and clean shapes. Fine detail, gradients, and photographic images are not achievable. DTF handles all of it.
● Color count: Embroidery thread colors are limited per design. DTF is full color with no color count restrictions.
● Minimum quantities: Embroidery digitizing has a setup cost that makes small runs expensive. DTF has no setup fee and no minimum order — you can order a single hat transfer.
● Feel: Embroidery sits raised above the fabric with a textured, stitched feel. DTF lies flat against the fabric with a softer, more flexible finish.
● Turnaround: DTF transfers are produced and ready to press quickly. Embroidery digitizing and production take longer, especially for new designs.
For logos with fine detail, multi-color graphics, or any design that would not translate cleanly into thread, DTF is the practical choice. For a simple, bold logo where the raised stitched look is part of the brand identity, embroidery still has a place.
Ordering DTF Hat Transfers
The process for ordering hat transfers is the same as ordering any DTF transfer — prepare your artwork as a transparent PNG at 300 DPI in RGB color mode, sized to your hat panel dimensions.
You can order hat transfers individually through our DTF transfers by size and quantity page, selecting the appropriate size for your hat design. If you are decorating multiple hats with different designs, the DTF gang sheet builder lets you arrange multiple small hat transfers on a single sheet to reduce your cost per transfer.
Want to test how a DTF transfer looks and feels on your specific hat before placing a full order? Our DTF transfer sample pack is the best way to run a test press. And if you have questions about sizing for a specific cap style, our team can help — reach us through the contact page and we will point you in the right direction.
Frequently Asked Questions
Can I use a regular heat press for DTF hat transfers?
Not reliably. A standard flat platen cannot make consistent contact with a curved hat panel. The center bonds but the edges do not, leading to peeling. You need a hat press or a curved platen attachment for consistent results.
What size should a DTF transfer be for a baseball cap?
For standard adult baseball caps, keep your design between 3.5 and 4.5 inches wide and 2 to 3 inches tall. Measure the actual flat area of your specific cap's front panel before finalizing your size — panel dimensions vary by brand and style.
Will DTF transfers crack on hats over time?
DTF transfers on hats hold up well with proper care. The main risk factors are low pressing temperature, insufficient pressure during application, and high-heat machine washing. Hand wash or machine wash cold, and reshape the hat and air dry after washing.
Can DTF transfers go on the side or back of a hat?
Yes. Side panels and the back panel above the closure are common placement options. The same principles apply — you need a curved pressing surface that matches the panel you are decorating, and the transfer must stay within the flat area of the panel away from seams and structured edges.
Get Started with Hat Transfers
DTF printing on hats opens up design possibilities that embroidery simply cannot match — full color, photographic detail, fine lines, and no setup fees. The key is the right equipment and the right technique.
If you are ready to add hats to your custom apparel lineup, start with a DTF transfer sample pack to test on your specific hat style. Or head straight to our DTF transfers by size and quantity and order the exact size you need for your hat panel. Our video tutorials also cover pressing technique in detail if you want a visual walkthrough before your first press.


