


DTF printing is only as good as the file you send. The press settings, the transfer quality, the fabric — none of that matters if your artwork file is set up wrong. A low-resolution image prints blurry. A JPEG with a white background produces a white box around your design. The wrong color mode shifts your colors in ways you did not expect.
The good news is that preparing artwork for DTF printing is not complicated once you know the rules. This guide walks through every requirement — file format, resolution, color settings, background, white ink, and sizing — so your files come out right the first time.
File Format: Use PNG, Not JPEG
The single most important file format rule for DTF printing is this: always submit your artwork as a PNG with a transparent background.
Here is why that matters. JPEG files use lossy compression, which degrades image quality and, more critically, does not support transparency. When you submit a JPEG with a white background, the printer has no way to distinguish your design from the white background — so the white gets printed too, leaving a visible box or halo around your design on the finished garment.
PNG files support alpha channel transparency, which means the areas outside your design print as nothing. The transfer contains only the artwork itself, and when pressed onto a shirt, only the design area bonds to the fabric. Clean edges, no background box.
● Use PNG format for all DTF artwork
● Set the background to transparent before exporting
● Avoid JPEG, BMP, TIFF, or GIF formats for production files
If you are working in Adobe Photoshop, Illustrator, Canva, or similar tools, export as PNG with the transparency option enabled. In Photoshop, this means flattening only your design layers while keeping the canvas background layer deleted or hidden.
Resolution: 300 DPI Minimum
Resolution determines how sharp your print looks. DTF transfers reproduce fine detail well — but only if your file has enough resolution to begin with. Upscaling a low-resolution image does not add detail; it just makes the existing pixels larger and blurrier.
The standard requirement for DTF artwork is 300 DPI (dots per inch) at the final print size. This means if you are printing a 12-inch design, your file needs to be 3,600 pixels wide (12 inches × 300 DPI = 3,600 px). A 72 DPI web graphic stretched to that size will look pixelated and soft.
● Minimum resolution: 300 DPI at the intended print size
● Ideal resolution: 300–350 DPI for sharp fine lines and small text
● Do not upscale low-resolution images — start with a high-resolution source file
A quick way to check: in Photoshop, go to Image > Image Size. Make sure the dimensions match your intended print size at 300 DPI without resampling. If you have to increase the file size significantly to hit 300 DPI, your source artwork is too low-resolution.
If you are unsure about your file quality before ordering, our FAQ about artwork and sizing covers the most common resolution questions we hear from customers.
Color Mode: RGB for DTF
This surprises many people who come from a print background. Offset printing and screen printing use CMYK color mode. DTF printing uses RGB.
DTF printers — including the equipment used to produce your transfers — are driven by RIP software that converts colors internally. That software is built to work from RGB input. When you submit a CMYK file, the color conversion happens twice: once when the file was originally converted to CMYK, and again when the RIP converts it back to RGB for the printer. Each conversion introduces color shift, and the result is often duller, less saturated colors than you intended.
Submit your artwork in sRGB color mode and let the RIP handle the conversion once. Your colors will come out closer to what you designed.
● Color mode: RGB (sRGB color profile preferred)
● Avoid submitting CMYK files — colors will shift
● For vibrant reds, oranges, and blues, RGB gives you the full gamut the printer can produce
Transparent Background: Why It Is Non-Negotiable
This ties back to the file format section, but it is worth addressing on its own because it is the most common mistake we see from new customers.
A DTF transfer prints exactly what is in your file. If your file has a white background, a white background gets printed. That white layer bonds to the garment just like the rest of the design. On a white or light shirt, you might not notice it immediately — but the edge of the design will have a subtle box, and the white layer adds stiffness to areas that should feel like bare fabric.
On a dark or colored garment, a white background becomes immediately obvious and ruins the print entirely.
Remove the background before you submit. In Photoshop, use the Magic Wand, Select Subject, or Background Eraser to isolate your design. In Illustrator, clipping masks and the pathfinder tool handle this well. Export as PNG with transparency confirmed.
● Delete or hide the background layer before exporting
● Confirm the PNG has a transparent (checkerboard) background in your software
● Never submit artwork with a white, black, or colored solid background
White Ink: How DTF Handles Dark Garments
One of the advantages of DTF over many other printing methods is that the process automatically includes a white ink underbase. This is critical for printing on dark or colored garments, because color inks are semi-transparent — without a white base underneath, colors printed directly on black fabric look muddy or disappear entirely.
When the RIP software processes your file, it generates a white ink layer automatically beneath your artwork wherever your design sits. You do not need to add white manually to your file. In fact, you should not add a solid white background layer — that would print a white box, which is exactly what we covered in the previous section.
What this means for your file preparation is simple: just submit your artwork on a transparent background, and the white underbase will be handled correctly in production. Your colors will print bright and accurate on any garment color, including black, navy, red, and other dark fabrics.
Sizing Your Artwork Correctly
Before you submit, know the size you want printed. DTF transfers are produced at the dimensions you specify, so an accurate size in your file matters. A few guidelines:
● Standard front chest print: 10–12 inches wide
● Oversized or full-front print: 13–15 inches wide
● Left chest or small logo: 3–4 inches wide
● Back full print: 12–14 inches wide
● Sleeve print: 3–4 inches wide, 10–12 inches tall depending on placement
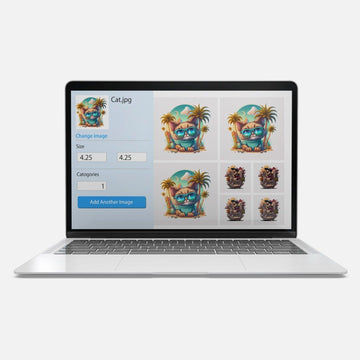
When you order DTF transfers by size and quantity, you select the dimensions at checkout. Size your file to match those dimensions at 300 DPI. If you are building a DTF gang sheet, the online builder lets you arrange multiple designs at different sizes on a single sheet — size each design correctly within the builder before submitting.
Text and Fine Lines: Special Considerations
Fine details are where DTF printing really shines compared to other methods — but there are still limits to keep in mind.
● Minimum readable text size: approximately 6–8pt at print size. Anything smaller tends to fill in or become illegible after pressing.
● Fine lines: keep stroke widths at 0.5pt or above for reliable reproduction
● Outlined vs. live text: convert all text to outlines before submitting to avoid font substitution issues
● Halftones and gradients: DTF handles gradients smoothly — no need to convert to halftone patterns
If your design has very small text — a website URL, a tagline in a logo — test it at actual print size on screen before submitting. If you cannot read it clearly at 100% zoom on screen, it will not read clearly on the shirt.
Checklist: Is Your File Ready to Submit?
Before uploading your artwork, run through this list:
● File format: PNG
● Background: transparent
● Resolution: 300 DPI at intended print size
● Color mode: RGB (sRGB)
● Text: converted to outlines
● Size: matches your order dimensions
● Fine lines: 0.5pt stroke or thicker
● No white background layer added manually
If all of those are checked, your file is ready. If you have questions about a specific file before ordering, our team is happy to take a look — reach us through the contact page and we will give you a straight answer before your order goes to print.
What Software Should You Use?
The tools you already know tend to work fine. Here is a quick overview of what works well for DTF artwork preparation:
● Adobe Photoshop: Best for photo-based and raster artwork. Work at 300 DPI from the start and export PNG with transparency.
● Adobe Illustrator: Best for vector artwork, logos, and designs with sharp edges. Export as PNG at 300 DPI by setting your document size and resolution correctly in the export dialog.
● Canva: Works for simple designs. Use the transparent background option (available on Canva Pro) when downloading. Check resolution before submitting — Canva can export at lower DPI for large designs.
● CorelDRAW: Common in the custom apparel industry. Strong vector tools and good PNG export with transparency support.
● Procreate: Works well for hand-drawn artwork. Export as PNG at maximum resolution and verify DPI in Photoshop before submitting.
Whatever software you use, the output requirements are the same: transparent PNG at 300 DPI in RGB color mode.
Frequently Asked Questions
Can I submit a vector file like AI or EPS for DTF printing?
Vector files like AI, EPS, or SVG are not typically accepted directly for DTF production. Convert your vector artwork to a high-resolution PNG (300 DPI) at your intended print size before submitting. The conversion preserves your sharp edges while producing the file format the production workflow requires.
My design has a drop shadow or glow effect — will it print correctly?
Yes, as long as the shadow or glow fades to transparent (not to white or a solid color). Effects that fade to transparency will print exactly as designed — the semi-transparent pixels will blend into the garment color naturally. Effects that fade to white will print the white, so make sure those are also set to transparent in your export.
Can I use a JPEG if I remove the background first?
No. Even if you remove the background in an editing tool, saving as JPEG re-introduces a white background because JPEG does not support transparency. Always save your final file as PNG to preserve the transparent background.
What is the maximum print size for DTF transfers?
Maximum print sizes vary by supplier and equipment. At dtfprint.me, check the size options available when you order transfers by size and quantity — the available dimensions are listed there. For larger designs, a ready-to-print gang sheet can accommodate wider print areas.
Get Your File Right, Get a Great Print
Most artwork problems are easy to catch before you submit. A transparent PNG at 300 DPI in RGB mode covers the vast majority of what you need. Take five minutes to verify your file against the checklist above and you will avoid the frustration of a reprint.
Need to see how your design will look before committing to a full order? Try our DTF transfer sample pack to test your artwork on an actual transfer first. And if you want to maximize your order value, the DTF gang sheet online builder lets you arrange multiple designs on one sheet at the right sizes — no guesswork required.


