


Getting a DTF transfer onto a shirt sounds simple — and it is, once you know the right settings. But if your temperature is off by 20 degrees or you peel at the wrong moment, you end up with a transfer that bubbles, peels early, or leaves residue on the fabric.
This guide covers everything you need to press DTF transfers correctly: the right temperature, how long to press, how much pressure to use, when to peel, and how to adjust for different garment types. Follow these settings and your prints will bond cleanly, look sharp, and hold up wash after wash.
The Standard DTF Heat Press Settings
For most DTF transfers on cotton and cotton-poly blend garments, these are the baseline settings:
● Temperature: 300–320°F (148–160°C)
● Press time: 10–15 seconds
● Pressure: Medium to firm (around 40–60 PSI, or a 4–6 on most manual press scales)
● Peel: Warm or cold peel, depending on the transfer type
These ranges work for the majority of standard DTF transfers. Always check any spec sheet or instructions that come with your specific transfers, since film type and adhesive formulations can vary between suppliers.
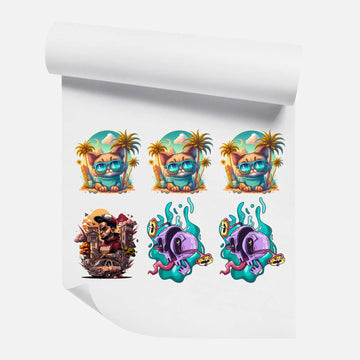
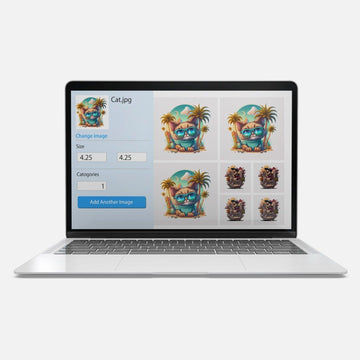
At dtfprint.me, all our transfers — whether ordered as single DTF transfers by size or through the DTF gang sheet builder — are produced with consistent adhesive coverage so your press settings stay predictable.
Temperature: Why It Matters and What Happens When It Is Wrong
Temperature is the most important variable in the entire press process. Too low and the adhesive never fully activates — your transfer will look fine off the press but start lifting or peeling after the first wash. Too high and you risk scorching the fabric, melting synthetic fibers, or burning through thinner garments.
Too Cold (Below 290°F)
The hot-melt adhesive powder in a DTF transfer requires enough heat to fully melt and bond with the fabric fibers. At lower temperatures, that bond is incomplete. The transfer may appear stuck but will peel or crack prematurely. If you are seeing transfers that lift at the edges after washing, low temperature is usually the first thing to check.
Too Hot (Above 330°F)
Excess heat can scorch cotton, cause polyester to shrink or warp, and can make the adhesive over-cure, which ironically makes the transfer brittle and prone to cracking. On performance fabrics and tri-blend shirts, high heat can also leave sheen marks or permanently change the fabric texture.
The Right Zone: 300–320°F
This range gives the adhesive enough heat to melt fully and penetrate the fabric surface without stressing the garment. For most everyday cotton t-shirts, 315°F for 12 seconds hits the sweet spot. Start there, run a test press on a scrap garment, wash it, and adjust from that baseline.
Press Time: How Long Should You Press a DTF Transfer?
The standard press time for DTF transfers is 10 to 15 seconds under firm pressure. Ten seconds is the minimum for a good bond; anything under that and you risk incomplete adhesion. Fifteen seconds gives you a little extra safety margin, especially on thicker or textured fabrics.
You do not need to press longer than 15 seconds for standard transfers. Extended press times on heat-sensitive fabrics like tri-blends or nylon can cause damage. Longer is not always better — what matters is getting the temperature and pressure right so the adhesive bonds fully within that window.
For a two-press method (see the section on problematic fabrics below), you split the time across two presses rather than increasing the duration of a single press.
Pressure: How Firm Should the Press Be?
Pressure is the variable most people underestimate. Too little pressure and the transfer sits loosely on the fabric surface, creating air pockets where the adhesive cannot bond properly. Those spots become the first places to peel.
The right pressure varies by press type:
● Clamshell and swing-away presses: Aim for medium-firm. Close the handle so it has noticeable resistance but is not straining. On a 1–10 dial, a 4–6 is appropriate.
● Pneumatic presses: Set to 40–60 PSI for standard garments. You can go slightly lower for delicate fabrics.
● Manual mini presses: Apply steady downward pressure with your full body weight for the duration. These presses often under-perform because users do not press hard enough.
A quick test: after pressing, if you can see fabric texture through the transfer or feel ridges, your pressure is too light. The transfer surface should look smooth and flat, fully in contact with the fabric.
Hot Peel vs. Cold Peel: Which One Are You Using?
DTF transfers come in two peel types, and using the wrong method for your transfer is one of the most common causes of failed applications.
Hot Peel DTF Transfers
Peel the carrier film immediately after pressing while the transfer is still hot. The adhesive is soft and bonds quickly to the fabric. Hot peel transfers typically produce a slightly softer, more matte finish. If you wait too long to peel a hot peel transfer, the film may stick and pull the ink off with it.
Cold (Warm) Peel DTF Transfers
Let the transfer cool to room temperature — or at least to a warm but not hot state — before peeling. The adhesive hardens as it cools, creating a firmer bond before you remove the film. Cold peel transfers are generally more forgiving and are the more common type. If you peel them hot, you risk pulling the design off the fabric.
Not sure which type you have? Check the transfer packaging or instructions. If you ordered from dtfprint.me, visit our instructions page or watch our video tutorials for step-by-step guidance on peel timing.
DTF Settings by Garment Type
While the standard settings work for most garments, some fabrics need adjustments.
100% Cotton
Cotton is the most forgiving fabric for DTF. Use standard settings: 310–320°F, 12–15 seconds, medium-firm pressure. Cotton handles heat well and produces clean, vibrant results.
Polyester and Performance Fabrics
Lower your temperature to 285–300°F and reduce press time to 10–12 seconds. Polyester is heat-sensitive and can shrink, warp, or develop a sheen at higher temperatures. Use a parchment paper cover sheet to protect the fabric surface.
Cotton-Poly Blends (50/50, Tri-Blend)
Press at 300–310°F for 12 seconds. The polyester content in the blend means you should avoid going above 315°F. Tri-blend shirts with rayon content are particularly heat-sensitive — test on a scrap piece first.
Nylon, Bags, and Hats
Nylon requires lower heat — stay at 270–290°F and reduce time to 8–10 seconds. Use a silicone pad under your pressing surface for even heat distribution. Structured hats require a hat press attachment for consistent contact. Flat pressing a hat on a standard platen produces uneven pressure and patchy adhesion.
Hoodies and Thick Fleece
The extra thickness of fleece and hoodie material absorbs heat. Increase your press time to 15 seconds and consider a second press of 5 seconds after re-positioning the cover sheet. The material needs a bit more time for heat to fully penetrate.
Common DTF Press Mistakes and How to Fix Them
Transfer peels or lifts at the edges after washing
Cause: Low temperature, insufficient pressure, or peeling too early on a cold-peel transfer. Fix: Increase temp to 315°F, firm up pressure, and wait a full 30 seconds before peeling.
Transfer cracks or feels stiff
Cause: Temperature too high, causing the adhesive to over-cure. Fix: Drop to 305°F and test. Also check that you are not re-pressing the same area multiple times.
Ink pulls off with the carrier film
Cause: Peeling hot when you have a cold-peel transfer, or peeling too aggressively. Fix: Let the transfer cool completely before peeling. Peel slowly at a low angle, not straight up.
Dull or faded colors after pressing
Cause: Cover sheet absorbing too much heat, or temperature too low. Fix: Use a silicone or Teflon cover sheet rather than regular parchment and verify your press is calibrated correctly. Uneven platens give hot and cold spots.
For more troubleshooting, check our FAQ about ordering or contact our team directly — we press transfers every day and can walk you through any issue.
Should You Re-Press After Peeling?
A re-press — also called a finish press — is an optional second press of 5 seconds after peeling the carrier film. It is not required for standard transfers but can produce a slightly smoother, more embedded look by pressing the ink layer further into the fabric.
If you re-press, lay parchment paper or a cover sheet over the design first to protect the print surface. Do not re-press bare ink directly with the platen — you will flatten the texture and can cause the design to stick to the platen.
Frequently Asked Questions
What temperature should I use for DTF transfers?
For most garments, 300–320°F (148–160°C) is the correct range. Use the lower end for synthetic and blend fabrics, and the higher end for 100% cotton. Always test on a scrap piece when pressing a new fabric type.
How long do I press a DTF transfer?
10 to 15 seconds under firm pressure at the correct temperature. Ten seconds is the minimum for a complete bond. Do not exceed 15 seconds on heat-sensitive fabrics like polyester or tri-blends.
Do I need a professional heat press for DTF transfers?
A professional clamshell or swing-away press gives the most consistent results. Mini presses and hand irons can work in a pinch, but they produce inconsistent pressure and temperature, which leads to uneven adhesion. If you are pressing more than a few shirts a week, a proper press is worth the investment.
Why is my DTF transfer not sticking?
The most common causes are temperature too low, pressure too light, or incorrect peel timing. Check all three. Also make sure your press platen is fully heated before pressing — some presses take 5–10 minutes to reach a stable temperature after the display reads the target.
Press with Confidence
DTF transfers are one of the most reliable decorating methods available — as long as your press settings are right. Start at 315°F, 12 seconds, medium-firm pressure, and adjust from there based on your specific garment and transfer type.
If you are just getting started or want to dial in your settings before a big run, order a DTF transfer sample pack and test on a few shirts before committing. Or browse our full range of DTF transfers by size and quantity and ready-to-print gang sheets to find the right option for your setup.


